Seamless Excellence: Alumina ACP Sheet Installation Guidelines

Installation

Fixing Accessories
01
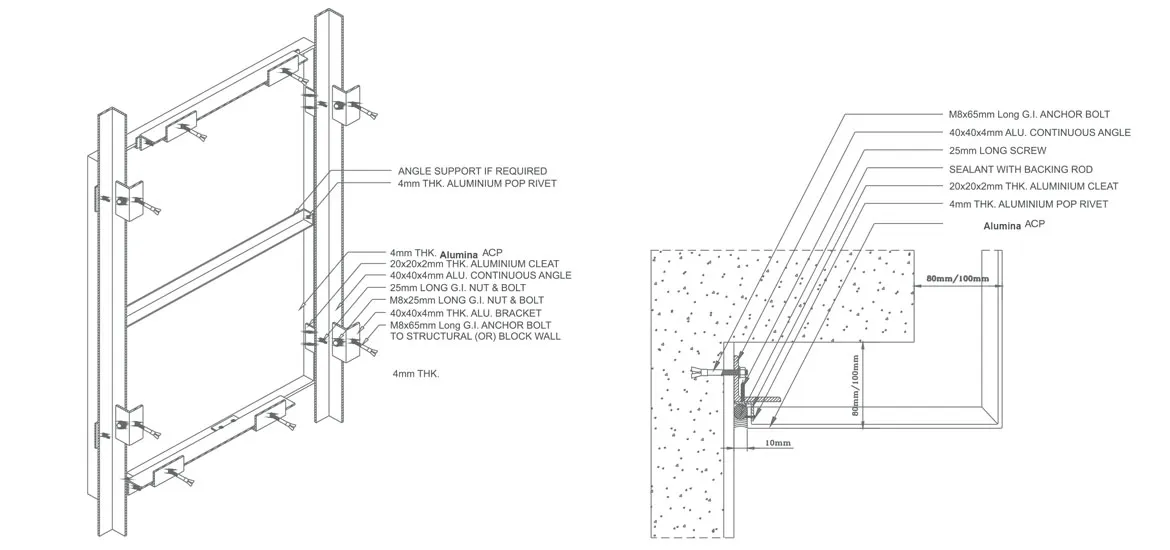
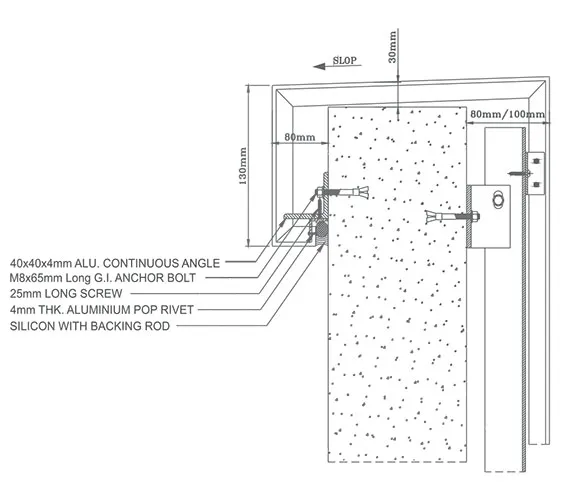
M8x65mm LONG ANCHOR BOLT
02
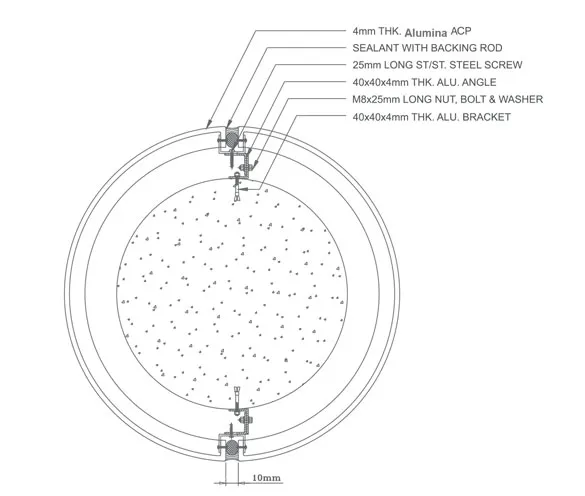
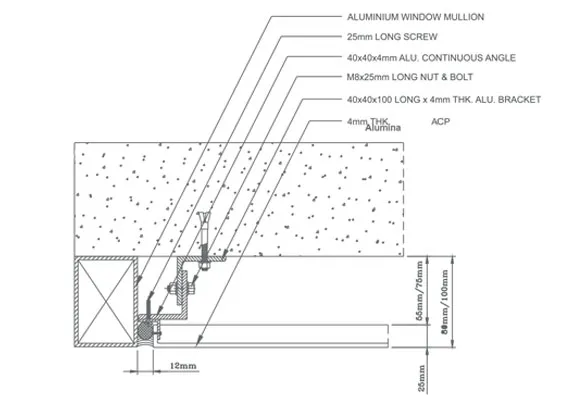
M8x25mm LONG NUT & BOLT
03
25mm LONG SCREW
04
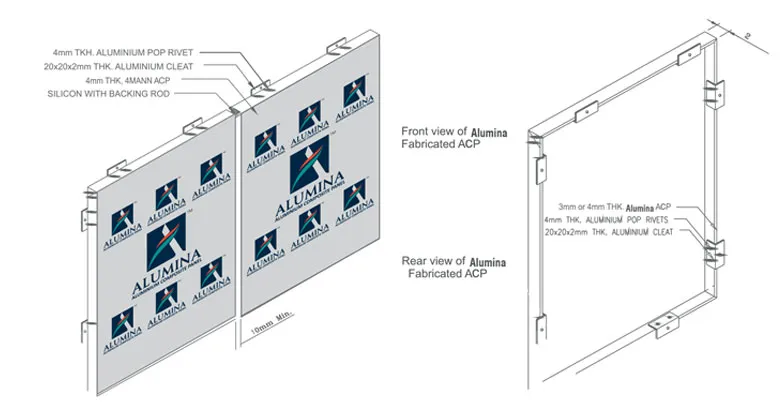
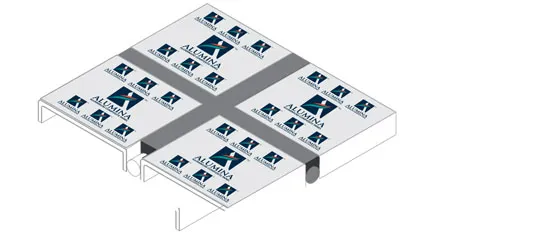
SEALANT WITH BACKING ROD
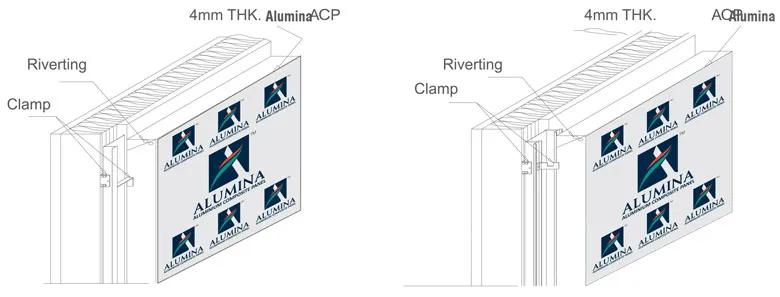
05
ALUMINIUM POP RIVET
06
20x20x2mm THK. ALUMINIUM ANGLE
07
40x40x4mm THK. x100mm LONG ALUMINIUM BRACKET
08
40x40x4mm THK. ALUMINIUM CONTINUOUS ANGLE
Installation Details
Method 1 :

Reinforcement behind panels are decided on the basis of side panels, installation height, location wind pressure, width of the panel etc.


Cassette fixing for Alumina ACP, Improved wind and damp proof properties. Convenient mobile fasteners.

Method 1 & Method 3:

Routing and return folding of Alumina ACP is done by V-groove cutting with a panel saw or hand panel saw with a standard depth of routing by keeping margin from edge of the panel to the center of the depth of the groove, within 15-25mm uniformly around the edges and folded inside so that the outer skin exposes outside and made a tray is called a tray panel.


Rout and Returns (R&R) Formed Panel
Rout and Return Joint Intersection

Rout and Return are then caulked and sealed to prevent moisture penetration.


Cladding To Structural Wall Interface (Soffit) :

Cladding Detail at Parapet Copping :

Cladding Detail of Circular coloum :

NOTE: For Alumina ACP circular pilar formation recommended minimum diameler should be 30 times of ACP thickness

Cladding to Cladding Interface :

Cladding to Curtain Wall Interface :

© 2024 ALUMINAINDIA | Design By Techno Bytes IT Solutions LLP